How to create a virtual device in qtrl.me and send values to it from Home Assistant, Homey, a script or a webhook, to use them in automations and on the dashboard.
A virtual device is a device that qtrl.me does not measure itself. It gets its values from you: the car's charge level from Home Assistant, a temperature from Homey, the number of unread emails from a script. As soon as a value exists, the device works like any other sensor in flows, thermostats and on the dashboard.
Cloud services like Shelly are connected instead under Connections, see the Shelly guide.
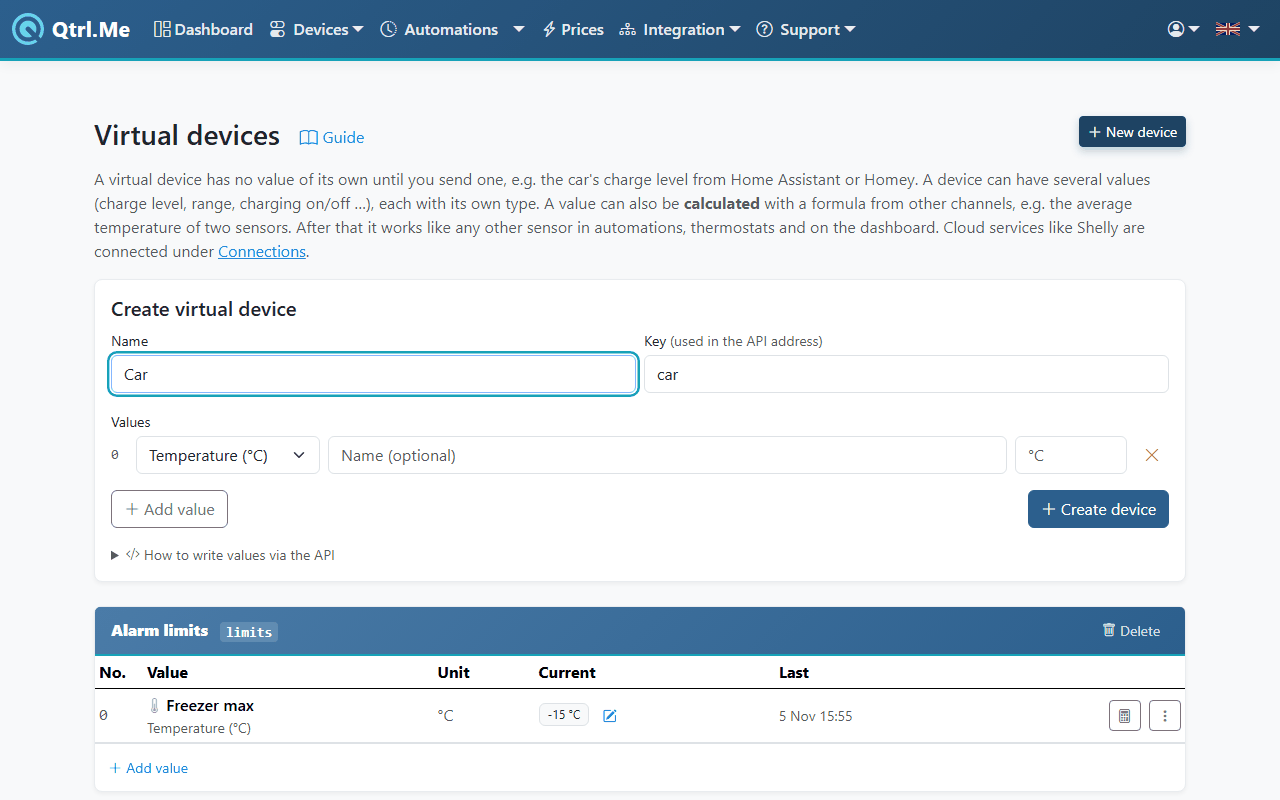
Create a device
- Go to Devices → Virtual devices and click New device.
- Enter a Name, for example Car, and a Key. The key is used in the address you send to and may only contain lowercase letters a–z, digits, hyphens and underscores.
- Under Values, click Add value for each thing you want to send in, and choose a type: Temperature (°C), Humidity (%), Number, Power (W), Energy (kWh), Light (lx), On/off, Dimmer (0–100 %), Button or Open/closed. Feel free to give the value a name, for example Charge level, and its own unit, for example % or km.
- Click Create device.
A device can have up to eight values. You can add, rename and remove values later.
Sending in values
Values are written using your API key, which you create under Tokens. There are two ways to do this.
PUT with JSON, for systems that can make regular API calls:
curl -X PUT https://qtrl.me/api/virtual/car/0 \
  -H "Authorization: Bearer <key>" \
  -H "Content-Type: application/json" \
  -d '{"value": 63}'
Webhook with GET, for systems that can only call an address:
https://qtrl.me/api/virtual/car/0/63?token=<key>
The number after the key is the value's number (No. on the page), in the order the values are shown. If you leave out the number, the first value, number 0, is written. For On/off send on or off, for Open/closed open or closed, for Button click, click-double, click-triple or click-long, otherwise a number. A Dimmer takes 0–100, and on brings back the last level.
The page shows the exact addresses for each device under How to write values via the API, so you can copy them from there.
Home Assistant
Add a rest_command in configuration.yaml and call it from an automation:
rest_command:
  qtrlme_car_charge_level:
    url: "https://qtrl.me/api/virtual/car/0"
    method: PUT
    headers:
      Authorization: "Bearer <key>"
      Content-Type: "application/json"
    payload: '{"value": {{ states("sensor.car_charge_level") }}}'
Homey
Use the Make a web request card (Logic) in a flow with method PUT, the address above and JSON as content, or the simple webhook address with GET.
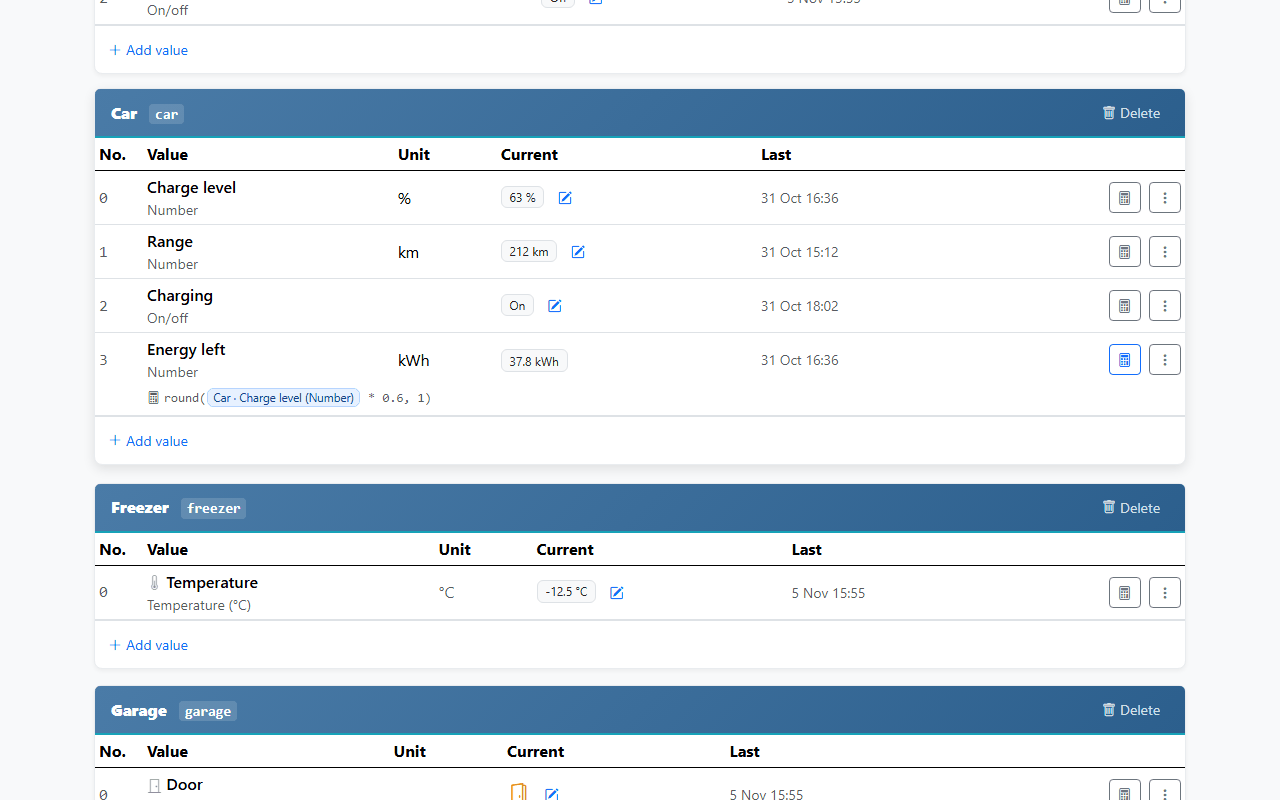
Changing a value by hand
Click the pencil next to a value on the page (Change the value here) to set it directly. This is handy for testing an automation before the real system starts sending values. A Button value has a Press button instead, which starts the automations that listen to it.
The menu with three dots on the value's row has Edit name and unit, Remove the value and, for on/off and dimmer values, Show as, which decides how the value is shown on the dashboard and in the device list.
Calculated values
A value does not have to be sent in from outside: it can instead be given a formula that calculates it from other channels, for example the average temperature of two sensors or the power in kW. Click the calculator button on the value's row. How formulas are written is described in the Calculated values guide.
The thermostat's device
A thermostat creates its own virtual device with set point, temperature, on/off and mode. It is labelled thermostat, follows the thermostat, and cannot be changed or removed here.
Good to know
- Virtual devices count towards the account's number of connected devices, together with devices from connections like Shelly. The number depends on your plan.
- The key in the address cannot be changed once the device is created. Create a new device instead.
- If the API key ends up in the wrong hands, remove it under Tokens and create a new one.